Adding artificial intelligence to your software can drastically improve user experience and automate common tasks. You can quickly learn how to show an AI assistant in an Oracle APEX application. The platform provides built-in tools to integrate generative AI services seamlessly. You will see how simple it is to get started with this modern technology.
Oracle APEX makes it easy to integrate conversational interfaces without complex coding. You simply need to configure a few workspace settings and page components. The setup process is straightforward and saves you hours of development time.
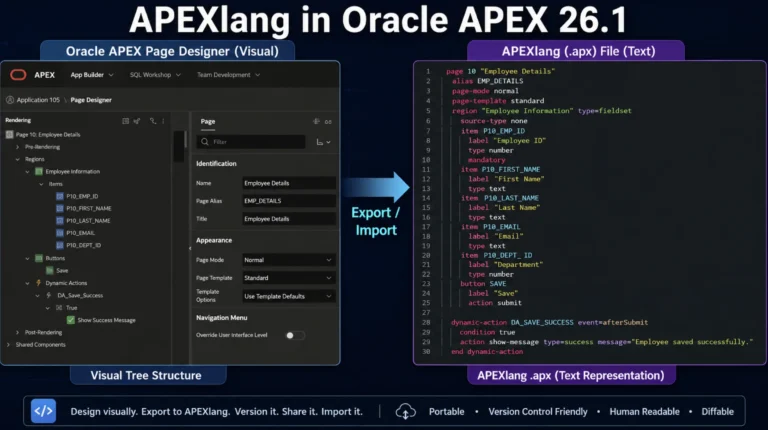
The integration of AI into low-code platforms represents a fundamental shift in how we build and interact with business applications.
Prerequisite: Enable Generative AI Services in Oracle APEX
You must enable AI services in your workspace before you can show the AI assistant chat in Oracle APEX. This is a crucial first step that unlocks all generative capabilities. Your application cannot communicate with language models without this foundation.
Start by logging into your development environment. Navigate to your workspace administration area to find the required settings. You need to access the Workspace Utilities menu to proceed.
This configuration acts as the bridge between your interface and the underlying language models. Without this essential connection, your chat dialog will not function. Taking the time to set this up correctly ensures a smooth user experience later.
Navigate to Workspace Utilities
Follow these steps to access the correct configuration area:
- Go to Workspace Utilities from your main navigation menu.
- Locate the Generative AI Services option within this section.
- Click on it to manage your artificial intelligence configurations.
Click the create button to establish a new service connection. You will need your API credentials and provider details for this step. If you need step-by-step guidance on this specific configuration, please check this comprehensive article on how to enable AI in Oracle APEX.
Show the AI Assistant Chat in Oracle APEX
You are ready to add the conversational interface to your page once the workspace service is active. The process involves creating a button and assigning a specific action to it. This approach gives you complete control over when and how the chat appears.
Users appreciate interfaces that are intuitive and easy to discover. Placing a dedicated chat button in a prominent location ensures high visibility. You can add this button to any region on your page.
An easily accessible conversational interface encourages user adoption. It provides immediate help and guidance right where users need it most. This feature can significantly reduce the learning curve for complex applications.
Step 1: Create a Button
Open the page where you want to show the AI assistant chat in Oracle APEX. Navigate to the rendering tree on the left side of your page designer. Right-click on your desired region, such as a Copy or Overview region, and create a new button.
Give your button a meaningful name like New or Chat Support. Set its position so it fits perfectly within your page layout. This button will serve as the trigger for your conversational interface.
Consider the user journey when placing this button on the page. A well-placed button feels like a natural extension of the application interface. Users should find it immediately when they need assistance.
Step 2: Create Triggered Action
You need to tell the application what happens when someone clicks the button. Locate the Triggered Actions section under your newly created button in the rendering tree. Right-click and create a new triggered action.
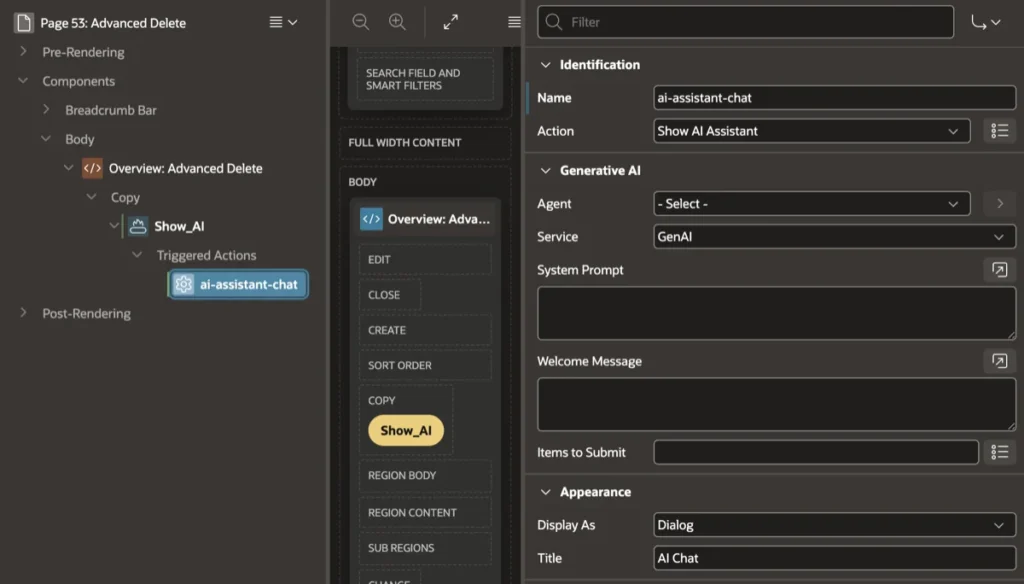
The property editor on the right side of the screen will now show configuration options. You must configure several sections here to make the chat work correctly. The following table breaks down the exact properties you need to set.
| Property Section | Field Name | Value or Purpose |
| Identification | Name | ai-assistant-chat |
| Identification | Action | Show AI Assistant |
| Generative AI | Agent | Leave as - Select - |
| Generative AI | Service | Select GenAI (change this to your Generative AI Static ID) |
| Generative AI | System Prompt | (Optional) Define specific rules, persona, or domain knowledge for the assistant. |
| Generative AI | Welcome Message | (Optional) Set a custom initial greeting displayed when the chat window opens. |
| Generative AI | Items to Submit | (Optional) Pass page item values to the AI to provide dynamic conversation context. |
| Appearance | Display As | Dialog |
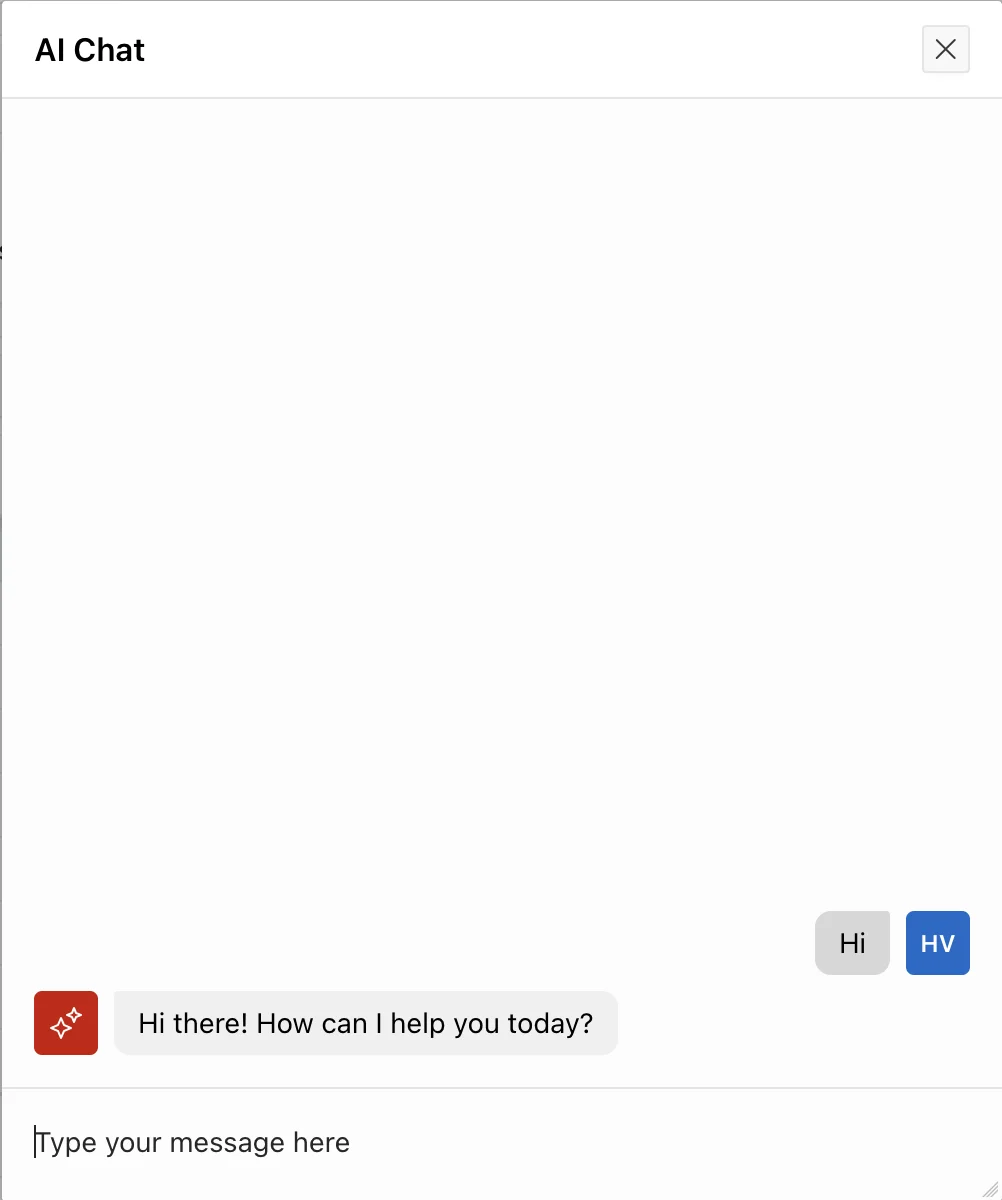
| Appearance | Title | AI Chat |
Generative AI Properties Details
The Generative AI section is where you connect the action to your configured service. You selected GenAI for the service field based on your workspace setup. You can leave the System Prompt and Welcome Message blank for a standard chat experience.
The Items to Submit field can also remain empty for this basic implementation. You only need to populate these advanced fields if you want to provide specific context to the language model. A simple conversational setup requires very little configuration.
Advanced users might later explore custom system prompts to guide the assistant's behavior. This allows the chat to respond with specific domain knowledge or formatting. However, a basic setup provides immediate value right out of the box.
Appearance Configuration
The Appearance section controls how the chat window presents itself to the user. Setting Display As to Dialog creates a clean popup window over your current page. This keeps users focused on their current context while they interact with the assistant.
The Title field determines the text displayed at the top of the dialog window. Setting it to AI Chat clearly indicates the window's purpose. You can customize this title to match your application branding.
A dialog window provides an optimal user experience for quick questions and interactions. It prevents the user from navigating away from their current task. This seamless integration makes the tool much more effective.
Test Your Oracle APEX AI Assistant
Save your changes in the page designer using the save button at the top right. Run the page to see your new implementation in action. You should see the new button you created in your specified region.
Click the button to trigger the action. The AI chat dialog will appear on your screen exactly as you configured it. You can now start typing messages and interacting with the generative AI service directly from your application.
Testing your implementation ensures your users have a seamless experience when seeking help or interacting with the application features.
Conclusion
You have successfully learned how to show an AI assistant in an Oracle APEX application. The combination of workspace generative AI services and simple page components makes this advanced feature highly accessible. Your users can now enjoy a modern conversational interface that enhances their overall experience and productivity.