If you have worked with Oracle APEX long enough, you know that Interactive Grids are incredibly powerful. But one thing that trips up a lot of developers is figuring out how to give users a clean, easy-to-use delete button right inside each grid row. In this article, I want to walk you through exactly how I do it.
Why a Row-Level Delete Button Makes Sense
Out of the box, Oracle APEX gives you a toolbar and a context menu to handle row deletion. These options work fine, but they are not always the most intuitive experience for end users. A dedicated delete button sitting right in the row is much clearer.
I find that when users see a trash icon next to the data, they immediately know what it does. It reduces confusion and lowers the number of support questions I get.
What You Will Need Before You Start
Before jumping in, here is what I assume you already have in place:
- An Oracle APEX application (version 19.x or later works great)
- An Interactive Grid region on one of your pages
- Basic familiarity with the Page Designer
- Access to edit the page attributes and region columns
You do not need any third-party libraries or plugins. Everything I will show you uses built-in APEX features.
Step One: Add a New Column to the Interactive Grid
The first thing I do is add a new column to the Interactive Grid. This column is going to hold the delete button. Here is how I set it up:
- Open Page Designer and select your Interactive Grid region.
- Right-click on the Columns node and choose Add Column.
- Set the column type to HTML Expression.
- Give it a meaningful heading like "Delete" or leave it blank if you prefer a cleaner look.
HTML Expression columns are perfect for this because they let me inject raw HTML directly into each row cell without any server-side source needed.
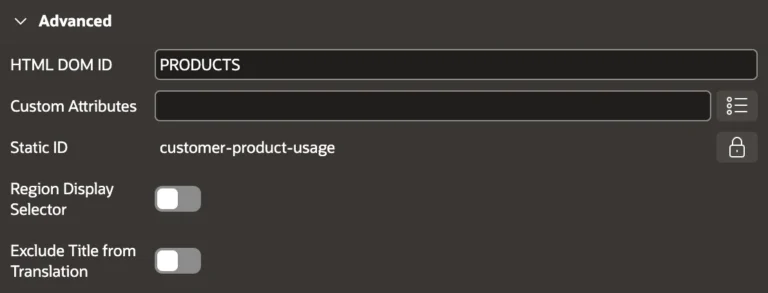
Setting the Source to None
This is a step people sometimes miss. In the column settings, under the Source section, I set the Source type to None. This tells APEX that the column is not backed by any database column or query expression.
If you skip this step, APEX may throw an error when it tries to find a data source for the column. Setting it to None keeps things clean and avoids that issue entirely.
Adding the HTML Expression for the Delete Button
Now comes the part that actually renders the button. In the HTML Expression field for my new column, I paste in this HTML:
<button type="button" class="a-Button a-Button--noLabel a-Button--iconTextButton" data-action="row-delete">
  <span class="fa fa-trash-o"></span>
</button>
Let me break down what each part does:
| Attribute / Class | Purpose |
|---|---|
| a-Button | Applies the standard APEX button styling |
| a-Button--noLabel | Hides any visible text label on the button |
| a-Button--iconTextButton | Styles the button to display with an icon |
| data-action="row-delete" | Tells APEX's Interactive Grid widget to delete the current row |
| fa fa-trash-o | Renders the Font Awesome trash icon |
The data-action attribute is the real magic here. APEX's Interactive Grid widget listens for clicks on elements with this attribute and handles the row deletion automatically.
Saving and Testing the Basic Delete Button
Once I save and run the page, I can see a small trash icon in every row of the grid. Clicking it removes the row immediately. This is already a huge usability improvement over the default toolbar approach.
At this point, though, there is one problem. The row gets deleted the moment someone clicks the button. There is no warning or confirmation prompt. That is risky, especially if users are prone to accidental clicks.
Why You Need a Confirmation Dialog
As someone who has built a lot of data-driven applications, I always add a confirmation step before any destructive action. A simple "Are you sure?" prompt can save users from a lot of frustration.
"The best user interfaces prevent mistakes before they happen," is a principle I always keep in mind. A confirmation dialog is one of the easiest ways to do exactly that.
Adding JavaScript to Show a Confirmation Prompt
To add a confirmation dialog before the row gets deleted, I use a small JavaScript snippet. I place this in the page's Execute when Page Loads section inside Page Designer.
Here is the full JavaScript code I use:
// Override the default OK/Cancel labels
apex.lang.addMessages({
    "APEX.DIALOG.OK": "Yes",
    "APEX.DIALOG.CANCEL": "No"
});

var deleteHandler = function(e) {
    if (e.target.closest('button[data-action="row-delete"]')) {
        e.preventDefault();
        e.stopImmediatePropagation();

        var button = e.target.closest('button[data-action="row-delete"]');

        apex.message.confirm('Are you sure you want to delete this row?', function(okPressed) {
            if (okPressed) {
                // Remove our listener temporarily
                document.removeEventListener('click', deleteHandler, true);

                // Trigger the native delete
                button.click();

                // Re-attach our listener after APEX processes the delete
                setTimeout(function() {
                    document.addEventListener('click', deleteHandler, true);
                }, 200);
            }
        });
    }
};

document.addEventListener('click', deleteHandler, true);
Breaking Down How the JavaScript Works
I know that block of code looks like a lot at first glance, but each part has a specific job. Let me walk through it section by section.
Overriding the Dialog Button Labels
The first few lines use apex.lang.addMessages to change the default OK and Cancel text to "Yes" and "No". This small tweak makes the confirmation dialog feel more natural and user-friendly.
Intercepting the Click Event
The deleteHandler function listens for any click on the page using the capture phase (the true parameter in addEventListener). When a click hits a button with data-action="row-delete", it intercepts it before APEX can process it.
I use e.preventDefault() and e.stopImmediatePropagation() to block the original click from reaching APEX. This gives me a chance to show the confirmation dialog first.
Showing the Confirmation and Triggering the Delete
Once the user clicks Yes in the confirmation dialog, I temporarily remove my event listener. Then I programmatically click the original button, which lets APEX handle the actual row deletion. After a short delay of 200 milliseconds, I re-attach my listener so it is ready for the next delete action.
Where to Place the JavaScript in Page Designer
Getting the placement right is important. Here is exactly where I put this code:
- Open Page Designer for your page.
- Click on the page root node (the page number) in the left panel.
- In the right-hand Property Editor, scroll down to the JavaScript section.
- Find the Execute when Page Loads field and paste the code there.
This ensures the script runs after the page and the Interactive Grid widget are fully initialized.
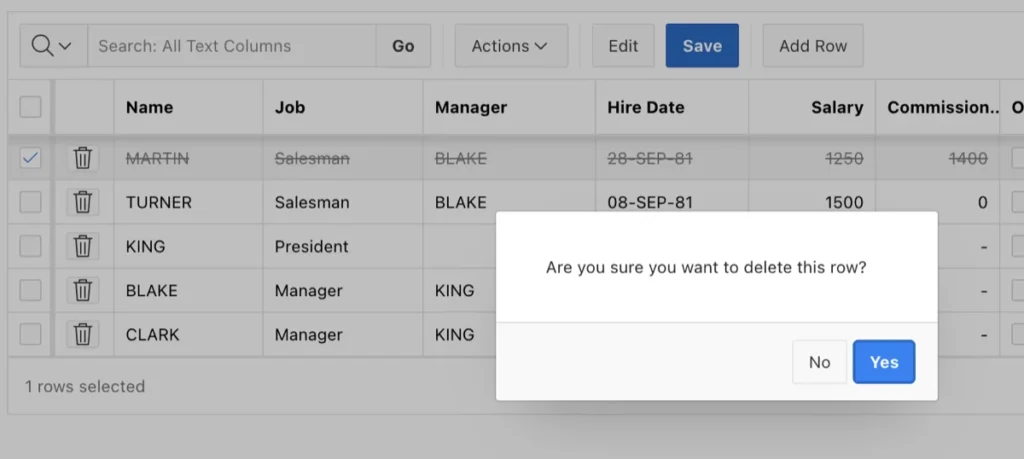
Testing the Confirmation Dialog
After saving and running the page, I now get a clean confirmation prompt every time I click the trash icon. The dialog shows my custom Yes and No buttons. If I click Yes, the row is removed. If I click No, nothing happens and the data stays intact.
This is a much safer experience for users, and it only took a small amount of configuration and a single block of JavaScript.
Conclusion
Adding a delete button directly inside Interactive Grid rows is one of those small changes that makes a big difference in how users experience your APEX application. By adding an HTML Expression column with the right data-action attribute and setting the source to None, I get a working delete button with minimal effort.
Layering in the JavaScript confirmation handler takes it a step further by making the feature safer and more professional. Once you set this up in one app, you will want to use it everywhere. It is one of those patterns that just works really well.